A step-by-step guide to upload critical information, data, and files from your enterprise VPC to our secure SFTP server
Client Software
Internally, at Plexflo, we use WinSCP for our SFTP needs. You can download it from here. However, you are free to use your own FTP client like FileZilla, Cyberduck or any other tool that your company uses today.
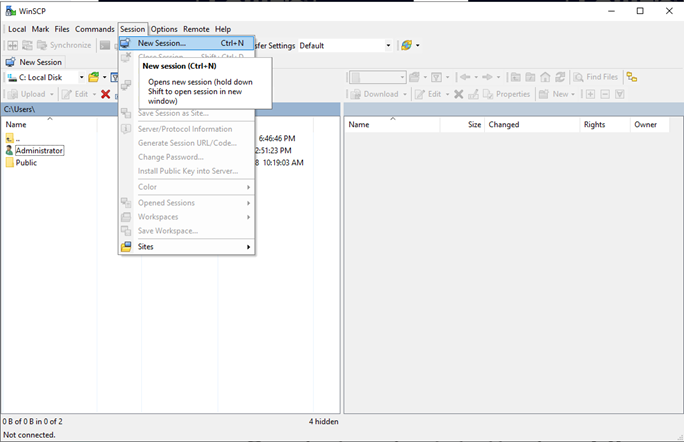
Step 1: Create a new session
Step 2: Username
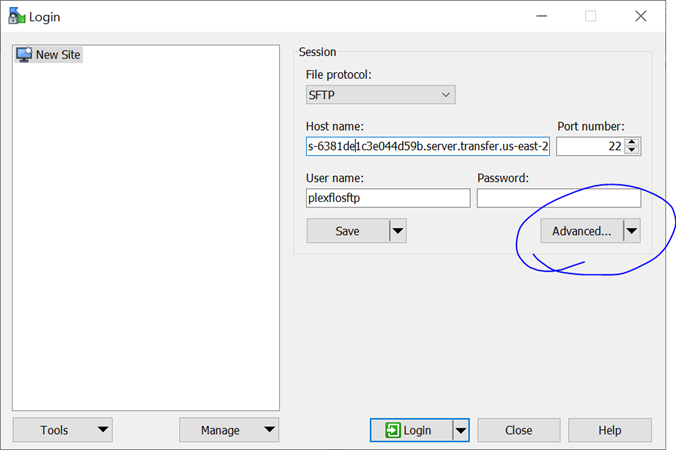
Once you set up a project, your account manager will give you a secure URL. For now, let's use a generic URL we have as a test setup.
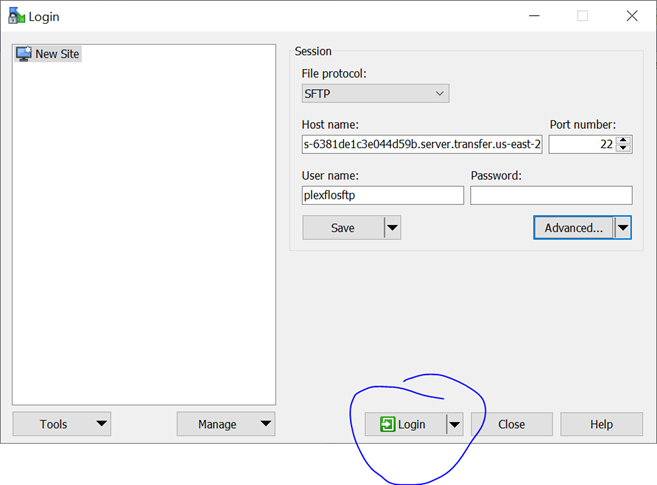
Provide the Hostname = s-9381de1c3e044d59b.server.transfer.us-east-2.amazonaws.com (
Provide the username = plexflosftp
Port = 22 (default)
No password required. Then, hit Advanced.
Step 3: Adding the SSH Key
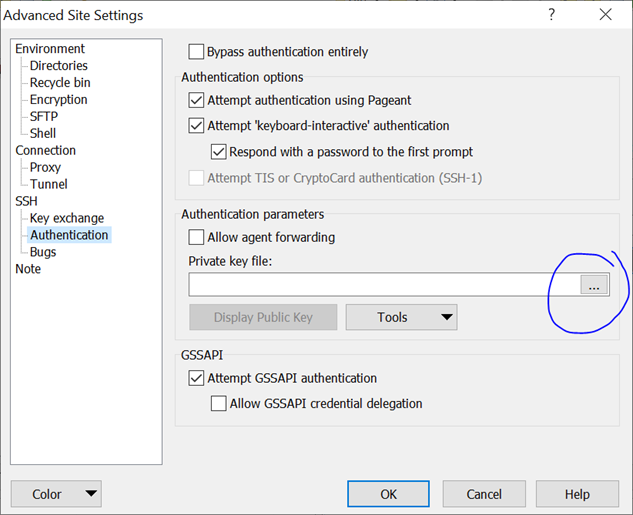
After hitting the Advanced Key, click “Authentication” on the left sidebar. Then, we have to add the SSH Private Key file that is provided to you (It is typically called ‘sshkey.ppk’)
Step 4: Login
After the SSH Private key is added to the Authentication – we come back to the original screen and hit login.
Known Issues in WinSCP
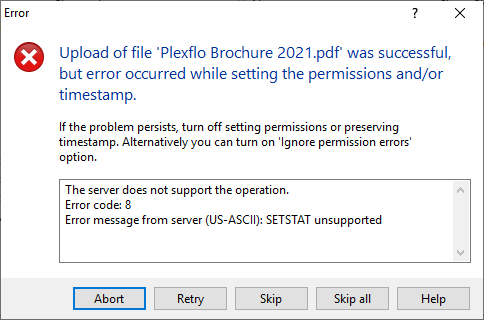
Since Plexflo’s server and our end-user’s servers are typically in different time zone, while uploading a file – it is very common to get the following message after a file finishes uploading. Though it looks like an error message – the file does get transferred to our SFTP cloud server.
To avoid seeing this error message – go to “Options > Preferences” … then, hit “Transfer” on the left sidebar. With the “Transfer” tab open, hit “Edit” button. In the Edit options, you will see a “Common Options” section. Uncheck the “Preserve Timestamp” option to avoid seeing the above error.
See the screenshots below for reference:
